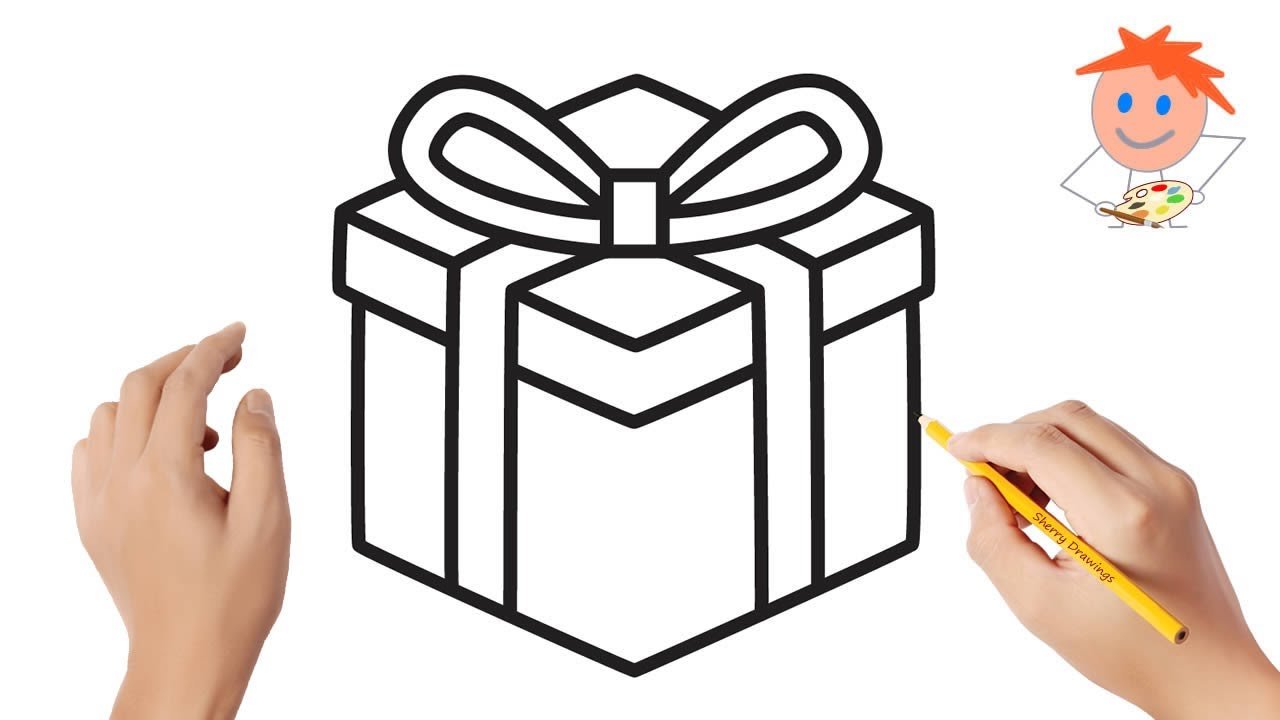
To draw a gift box, start by sketching a simple rectangular shape. Next, add flaps on the sides for the lid and base. Then, connect the corners with straight lines to create a 3D effect. Enhance the details by adding ribbons or bows for a festive touch. As you follow these steps, you’ll master the art of drawing a gift box effortlessly. Let’s dive into the creative process and bring your gift box illustrations to life!

How to Draw a Gift Box: A Fun and Creative Tutorial for Kids
Do you love giving gifts to your friends and family? Have you ever wanted to make your gift even more special by drawing a beautiful gift box to go along with it? Well, you’re in luck! In this tutorial, we will show you step by step how to draw a cute and colorful gift box that you can use to decorate your presents or create a lovely piece of art. So, grab your paper, pencils, and let’s get started on this fun drawing adventure!
Materials You Will Need:
Before we dive into the exciting world of drawing a gift box, let’s gather all the materials you will need for this creative project. Make sure to have the following items ready:
- A blank sheet of paper
- A pencil
- Colorful markers or crayons
- An eraser
Now that you have all your supplies in place, let’s begin our journey into the art of drawing a fantastic gift box!
Step 1: Drawing the Base of the Gift Box
To start drawing your gift box, pick up your pencil and draw a simple square shape in the center of your paper. This square will be the base of your gift box. Make sure the lines are light so you can easily erase any mistakes later on.
Tips:
– Try to make all four sides of the square equal in length for a balanced look.
– Don’t worry if your square isn’t perfect; practice makes perfect!
Step 2: Adding the Lid of the Gift Box
Next, draw another square above the base square you just created. This square will represent the lid of your gift box. Make sure it is slightly larger than the base square to give your gift box a realistic look.
Tips:
– Take your time to align the lid square with the base square.
– You can use a ruler to help you draw straight lines if you want extra precision.
Step 3: Drawing the Bow
Now, let’s add a pretty bow to our gift box to make it even more special! Draw two loops on the top of the lid square, resembling the shape of a bow. Then, add two tails extending down from the loops to complete the bow design.
Tips:
– Experiment with different bow styles to personalize your gift box.
– You can also add small details like dots or stripes to decorate the bow further.
Step 4: Adding Details and Decorations
To make your gift box more colorful and festive, it’s time to add some fun details and decorations. Use your markers or crayons to color the base and lid of the gift box in your favorite shades. You can also draw patterns, such as stripes, polka dots, or stars, to make it unique.
Tips:
– Feel free to get creative with your color choices; there are no rules in art!
– Mix and match different patterns and colors to create a vibrant gift box design.
Step 5: Final Touches and Cleanup
Once you have finished coloring and decorating your gift box, take a moment to review your artwork. Use an eraser to remove any stray pencil marks or smudges, giving your drawing a clean and polished look. Admire your beautiful gift box creation and get ready to showcase it to your friends and family!
Tips:
– Be gentle with the eraser to avoid tearing the paper.
– Don’t be afraid to make mistakes; they are all part of the creative process.
Now that you have completed all the steps, congratulations on drawing your very own gift box masterpiece! You can use this drawing to embellish your gifts, create handmade cards, or simply enjoy it as a standalone piece of art. Remember, practice makes perfect, so keep honing your drawing skills and exploring your artistic talents. Have fun expressing yourself through your colorful and delightful creations!
In conclusion, drawing a gift box is a wonderful way to add a personal touch to your gifts and unleash your creativity. Whether you are a beginner or an experienced artist, this tutorial is an excellent opportunity to have fun and learn new drawing techniques. So, gather your supplies, follow the steps outlined above, and let your imagination soar as you create beautiful gift box illustrations that will surely put a smile on everyone’s face!
How to draw a gift box | Easy drawings
Frequently Asked Questions
How can I draw a simple gift box?
To draw a simple gift box, start by sketching a rectangular shape for the base. Then, add two smaller rectangles on top for the lid. Connect the corners with straight lines to form the sides of the box. Finally, add details like a ribbon or bow to complete the look.
What are some tips for adding depth and dimension to a gift box drawing?
To add depth and dimension, consider shading one side of the box darker to create a shadow effect. You can also add highlights on the opposite side to make it look more three-dimensional. Adding subtle details like creases or folds can also enhance the realism of the drawing.
How can I make my gift box drawing more festive and decorative?
To make your gift box drawing more festive, consider adding patterns or designs on the box itself, such as stripes, polka dots, or holiday motifs. Adding a colorful ribbon or bow on top can also enhance the festive look. Don’t forget to add shading and highlights to make the decorations pop.
Final Thoughts
In conclusion, drawing a gift box is simple with these steps. Start by sketching a rectangle for the base, adding parallel lines for the sides. Outline a bow or ribbon on top for a festive touch. Remember to add details like shading and color to make your gift box drawing pop. Practice regularly to perfect your technique in drawing a gift box.